Contents:
- Why Plait Your Own Hair?
- Preparing Your Hair for Plaiting
- Choosing the Right Hair State
- Detangling and Smoothing
- The Three-Strand Plait: The Foundation
- Step-by-Step Instructions
- Common Mistakes and How to Fix Them
- Two Additional Plaiting Techniques Worth Learning
- The Dutch Plait (Inside-Out Plait)
- The Fishtail Plait
- Styling and Finishing Your Plaits
- Creating Texture and Dimension
- Accessorising Your Plaits
- How Long Do Plaits Last?
- Troubleshooting: Solutions for Specific Hair Challenges
- Fine or Thin Hair
- Thick or Curly Hair
- Short Hair
- Maintaining Plaited Hair
- Frequently Asked Questions
- How long does it take to learn to plait your own hair?
- Can you plait wet hair?
- Is plaiting damaging to hair?
- What’s the difference between a braid and a plait?
- How often should you plait your hair?
- Moving Forward with Your Plaiting Practice
You don’t need a salon appointment to have beautifully plaited hair. Learning to plait your own hair saves you money, gives you creative control, and means you can refresh your look whenever you fancy. Whether you’re preparing for an event, creating a protective style, or simply wanting to master a fundamental hair skill, plaiting is entirely achievable with the right technique and a bit of practice.
The truth is, most people underestimate how quickly they can master plaiting. Within two weeks of regular practice, your hands will remember the motion, and you’ll stop thinking about each step. The difference between a neat plait and a messy one rarely comes down to talent—it comes down to preparation and understanding what your hair needs.
Why Plait Your Own Hair?
Salon visits for plaited styles cost £25 to £80 depending on complexity and your location in the UK. Over a year, that’s between £300 and £960 if you get your hair plaited monthly. Beyond the financial benefit, plaiting offers practical advantages that many people overlook.
A well-executed plait distributes tension evenly across your scalp, reducing stress on individual hair strands. This is particularly valuable if you have fine or fragile hair. Unlike tight updos that can cause traction alopecia (permanent hair loss from prolonged tension), properly plaited hair actually protects your ends from breakage and environmental damage. Your hair sits safely within the plait structure, shielded from friction against clothes and harsh weather.
Plaited hair also holds its shape and texture longer than other styles. A plait you create on Tuesday morning can look fresh on Wednesday evening with minimal touch-ups. This makes it ideal for people with busy schedules or those who travel frequently.
Preparing Your Hair for Plaiting
Success starts before you even begin braiding. The condition of your hair directly affects how easy or difficult plaiting becomes.
Choosing the Right Hair State
Freshly washed hair is slippery and difficult to control. The strands slide past each other, making it hard to maintain consistent tension. You’ll end up with loose plaits that unravel quickly. Instead, wait until your hair has been washed 2-3 days prior. This timeframe gives your natural scalp oils time to coat each strand, improving grip without making your hair greasy.
If you’ve just washed your hair and want to plait immediately, apply a light texturizing spray (around £4-6 at most chemists) to your damp strands. These products contain starch or clay that increase friction between hair sections, making them easier to control.
Completely dry hair works best for most people. Damp hair takes longer to dry and may develop an uneven texture as it sets within the plait. If your hair is naturally curly or wavy, plaiting while damp can set unwanted kinks in your strands.
Detangling and Smoothing
Tangles are the silent enemy of neat plaits. A single snarl can cause your plait to twist unevenly or come loose. Spend two minutes working through your hair with a detangling spray and a wide-tooth comb, starting from the ends and working upwards.
Once detangled, smooth your hair with a boar bristle brush. This distributes natural oils throughout your strands and aligns the hair cuticles in the same direction. The result is a plait with a smooth, polished appearance rather than a fuzzy texture.
For curly or textured hair, this step matters even more. Apply a light moisturising serum (approximately £8-12) before brushing to prevent frizz and make your curls more manageable during plaiting.
The Three-Strand Plait: The Foundation
Master this technique first. It’s the basis for everything else you’ll learn, and it’s genuinely useful for everyday wear.
Step-by-Step Instructions
Position yourself: Stand or sit facing a mirror with another mirror positioned behind you so you can see the back of your head. This two-mirror setup is crucial while learning. You’ll notice immediately when your plait starts to tilt or when one section becomes thicker than the others.
Divide your hair: Gather your hair at the point where you want the plait to begin (usually just above your ears for a side plait, or at the crown for a centre plait). Using your fingers, divide this section into three roughly equal parts. If your hair is very thick, it’s better to divide into three thicker sections than to struggle with hair that’s too fine to control.
Make the first cross: Take the right section and cross it over the middle section. The right section becomes your new middle. This motion should take about two seconds.
Complete the pattern: Take the left section and cross it over the new middle section. The left section now becomes your middle. Repeat this alternating pattern, always crossing the outer section over the middle.
Maintain consistent tension: Each cross should feel firm but not painfully tight. Your scalp shouldn’t hurt, and you should be able to fit your fingertip between the plait and your scalp. If your plait feels loose and wispy after three crosses, tighten up. If it feels pulling at your roots, loosen it slightly. This adjustment becomes instinctive after about 10 plaits.
Finish the plait: Continue until you reach the end of your hair. Secure with a small elastic band. Avoid thick, coloured elastics on thin hair—they’re noticeable and can snag strands. Silicone-free elastic bands or hair clips designed for braiding work better and cost £2-4 for a pack of ten.
Common Mistakes and How to Fix Them
Uneven sections are the most frequent problem beginners face. Your sections don’t need to be perfectly identical—your hands naturally compensate. However, if one section is noticeably thicker than the others, your finished plait will look lopsided. Solution: before you start the next plait, practise dividing your hair into three sections using only your fingers, without actually braiding. Do this five times. Your hands will start to recognise what equal thirds feel like.
Loose plaits that unravel happen when you don’t maintain tension throughout. Many people start strong and tighten the first few crosses, then relax as they go down their hair. The solution is counterintuitive: plait more slowly. Speed is the enemy when you’re learning. A slow, controlled plait maintains consistent tension far better than a rushed one.
Plaits that sit crooked against your head usually indicate uneven tension between your left and right hands. You might naturally pull tighter with your right hand, causing the plait to curve. Spend a couple of practice sessions focusing purely on keeping both sides of your plait equally tight. You’ll notice the difference immediately in the mirror.
Two Additional Plaiting Techniques Worth Learning
The Dutch Plait (Inside-Out Plait)
This plait looks more sculptural and sits higher on your head than a standard plait. Instead of crossing sections over the middle (as in a three-strand plait), you cross them under. This simple change creates a plait that appears to sit on top of your hair rather than weaving through it.
The hand motion is identical to a regular plait, except when crossing: your right section goes under the middle, then your left section goes under the middle. Many people find Dutch plaits easier to keep tight because the under-crossing motion naturally creates more tension. If you struggle with loose, wispy plaits, start with this technique.
A Dutch plait works particularly well on second-day or third-day hair because the added texture makes it easier to control. It also suits fine, straight hair better than regular plaits because the structural height of the plait creates visual volume.
The Fishtail Plait
This plait uses only two sections instead of three, yet looks more intricate. It creates an elegant, tapered effect and works beautifully for special occasions. Start by dividing your hair into two equal halves. Take a small section (about the thickness of your pinky finger) from the outside edge of the right half and cross it to the middle, then over to join the left half. Repeat on the left side. Continue alternating sides.
The key is taking very thin sections. Thick sections defeat the purpose—the plait won’t have that fine, detailed appearance. With thin sections, the fishtail takes longer (10-15 minutes) but the result is striking. Fishtail plaits hold remarkably well and typically last 2-3 days without loosening, even with active movement.
Styling and Finishing Your Plaits
The difference between a “just did this myself” plait and a salon-quality one often comes down to finishing touches.
Creating Texture and Dimension
Straight, tight plaits can look severe. Loosening them slightly creates a more flattering, intentional appearance. After securing the end, gently pull on the edges of your plait to make it slightly wider. Work from the bottom upwards, pulling each section outward just enough to loosen without unraveling. This process takes 30 seconds and transforms a neat plait into one with dimension and texture.
For more dramatic texture, pull sections out further. Pull larger sections out alternately down each side of the plait to create a deliberately imperfect, romantic look. This technique is particularly effective for evening events and photographs—the texture catches light beautifully and creates visual interest.
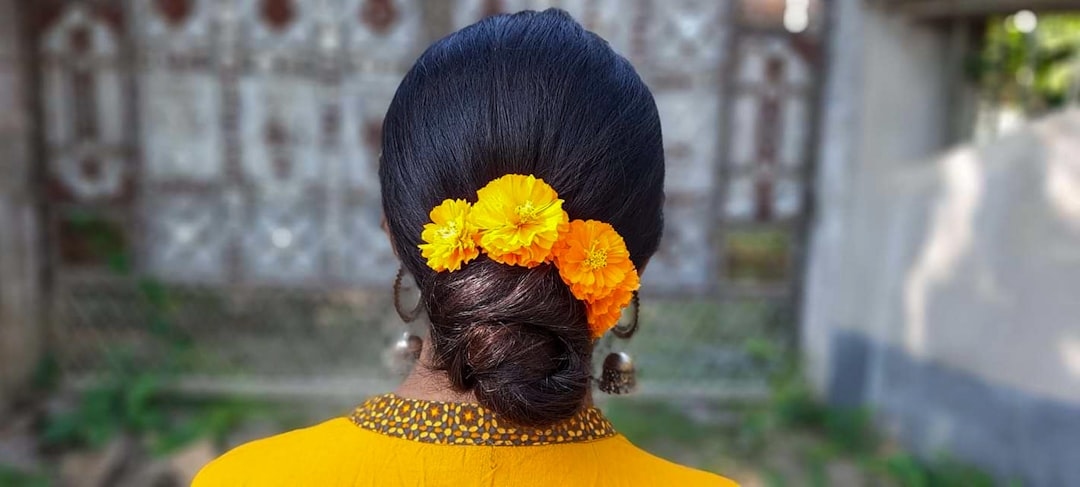
Accessorising Your Plaits
The right accessories elevate your plaited hairstyle. Silk hair scarves (£6-15) wrapped around the base of your plait add colour and texture while protecting your hair. Metal hair cuffs (£3-8) slide onto the plait itself and look effortlessly polished. Small pearl hair clips positioned near the elastic add a subtle, upscale finish without looking overdone.
Avoid heavy accessories on fine hair—they create tension points and can cause breakage. Lightweight options are always safer and often more aesthetically pleasing anyway.
How Long Do Plaits Last?
A freshly plaited style typically looks its best for 24-48 hours. After this, the plait begins to loosen slightly as your scalp oils distribute and your hair naturally moves. The good news: a loosened plait isn’t ruined. It often looks intentionally relaxed, which is currently quite fashionable.
To extend the life of your plaits, sleep on a silk pillowcase (around £12-20). Cotton pillowcases create friction that loosens plaits and causes frizz. Silk dramatically reduces both. If you don’t have a silk pillowcase, loosely wrapping your plait in a silk or satin hair bonnet (£5-10) before bed works equally well.
A plaited style can comfortably last 3-4 days if you’re willing to accept a slightly looser, more lived-in appearance. Many people actually prefer plaits on day 2 or 3 because they’ve loosened to a more flattering texture without looking too casual.
Troubleshooting: Solutions for Specific Hair Challenges
Fine or Thin Hair
Fine hair requires thinner plait sections, which makes tension control trickier. Your solution: use a light mousse or texturizing spray on dry hair before plaiting. These products cost £4-7 and make fine hair grip more effectively. Additionally, work with less hair overall. Instead of plaiting from your crown all the way down, start your plait lower, around ear level. This uses thicker sections of hair and creates a sturdier plait that holds better.
Dutch plaits work better than regular plaits for fine hair because the under-crossing technique creates more structural integrity. One Dutch plait will hold noticeably better than one regular plait in fine hair.
Thick or Curly Hair
Thick hair is actually easier to plait than fine hair because the sections naturally grip each other. Your challenge is managing the volume and ensuring the plait doesn’t look clunky. The solution: divide your hair into three sections that are slightly thicker than you think necessary, then pull the finished plait outward to add texture and reduce visual density. This makes the plait appear lighter and more elegant despite using thick sections.
For curly hair, detangle thoroughly with a leave-in conditioner (£6-12) before plaiting. Curly strands can tangle within the plait itself, causing your plait to look knotted. Work slowly and ensure each cross is deliberate. Some people find curly hair actually creates beautiful textured plaits because the natural curl adds visual interest to the plait structure.
Short Hair
Hair shorter than 20cm (8 inches) is difficult to plait because the sections don’t have enough length to maintain tension. If your hair is short and you want to plait it, focus on small, tight Dutch plaits starting from the crown. These can work beautifully as a detail or accent style even in short hair. Alternatively, consider extensions clipped into your hair at the roots (£15-40) to add length specifically for plaiting.
Maintaining Plaited Hair
How you care for your hair while it’s plaited affects both how long the plait lasts and the condition of your hair underneath.
Wash your hair while it’s plaited if you want the plait to last longer. Unplaiting, washing, and replaiting daily accelerates hair damage because you’re creating tension points repeatedly in the same spots. Instead, wash your hair gently with the plait intact, using lukewarm water and a sulphate-free shampoo (around £6-10). Massage your scalp gently, then rinse thoroughly. Allow the plait to air dry or dry it gently with a microfibre towel. This approach keeps your hair clean while preserving your style.
If you develop an itchy scalp while wearing a plait, the plait is too tight. Loosen it slightly or unplait and redo it with less tension. Chronic itching under a plait indicates your scalp isn’t getting adequate air circulation, which can lead to fungal issues. Never ignore this—it’s your scalp telling you the plait needs adjustment.
Frequently Asked Questions
How long does it take to learn to plait your own hair?
Most people execute a passable three-strand plait within their first attempt. A neat, salon-quality plait typically takes 2-4 weeks of regular practice (plaiting 2-3 times weekly). If you plait daily, you’ll achieve consistent, polished results within 10 days.
Can you plait wet hair?
Technically yes, but it’s not ideal. Wet hair is fragile and prone to breakage, and the plait won’t hold its shape as well as it dries unevenly. Damp hair (slightly moist but not dripping) is acceptable, but fully dry hair produces the best results for most people.
Is plaiting damaging to hair?
A properly executed plait with consistent, moderate tension is not damaging—it’s actually protective. Your hair sits safely within the plait structure, shielded from external friction. However, excessively tight plaits that cause scalp pain or create permanent crimp marks in your hair are genuinely damaging and can cause traction alopecia over time. The golden rule: if your scalp hurts, the plait is too tight.
What’s the difference between a braid and a plait?
In British English, “plait” is the standard term for the hairstyle created by interlocking three or more strands of hair. “Braid” is the American English equivalent. The terms describe the same hairstyles and techniques—it’s purely regional terminology. For this guide, both terms apply to the same methods.
How often should you plait your hair?
There’s no maximum frequency for plaiting healthy hair. You can safely plait your hair daily if you want to. The limiting factor is your scalp’s tolerance for tension. If your scalp feels sore or sensitive, give it a day or two rest. Most people comfortably plait their hair 5-6 days weekly without any issues, unplaiting only for washing and sleep.
Moving Forward with Your Plaiting Practice
Start with a basic three-strand plait in a quiet moment when you’re not rushed. The relaxed pace will allow you to focus on the hand motion and tension rather than speed. Record yourself with your phone to see what you’re doing from a third-person perspective—often you’ll spot tension imbalances or technique issues that the mirror alone won’t reveal.
Progress to Dutch plaits once three-strand plaits feel intuitive. Then experiment with fishtail plaits for special occasions. Within a month, you’ll have multiple plaiting techniques in your skillset, and you’ll stop thinking of plaiting as something that requires salon expertise. It’s a practical skill that pays for itself almost immediately and gives you endless styling options for years to come.